|
Basics of VIVO What is it? VIVO stands for Video In/Video Out, which outputs display to a television or equivalent display device as well as capture video from a playback source. Video can be captured through the VIDEO-IN ports into the computer to be exported into a digital format such as MPEG1 or AVI files. This capability gives you the freedom to add custom visual effects, cut scenes and background music to any of your home or business videos. Imagine, you can transfer video coverage of your last birthday party to your computer, edit the video to your liking and email the digital footage to your friends. Since many users already know how to enable the Video Out of VIVO, this article will be more about the use of Video In. If you haven't already viewed how our online article on TV-Out, please visit: Video Decoder/Encoder Chip The Philips SAA7108/E is a multi-standard video decoder and encoder chip that is on the video board of many of our GeForce4 and GeForceFX based products, offering video input and TV output processing. Video cards that did not originally offer the built-in VIVO capability such as the GeForce2 product lines can be upgraded to accommodate VIVO by removing the existing S-Video adapter module and replacing it with the VIVO module. This is ONLY applicable to the following products.
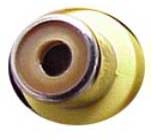
For more information on the VIVO module, please view our spec sheet: For more information on the Philips SAA7108/E encoder chip, please visit: Video Devices Recordable playback devices such as a VCR or camcorder can be used as a video source that plays video to be imported into your computer. The devices may be connected to the VIVO portion of the video card through either S-Video or RCA Composite ports.
Basic Setup of Video In
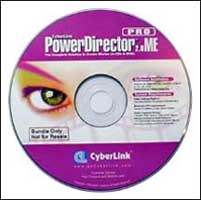
Step 1: Install the VIVO drivers from the Install CD version 8.2 or download them from our website. Reboot the computer when the installation has completed. Step 2: Install the Video Editing Software (for example: Cyberlink® PowerDirector® Pro). Reboot. Step 3: Physical Connection: you may connect to the VIVO portion of the video card in either one of two ways, S-Video OR RCA.
Step 4: Make sure the playback device is first turned on before the computer is powered up so the video card can properly detect the playback device. Step 5: Run the video editing software and have it set to Capture. Be sure to specify the video input in the configuration by selecting either S-Video or RCA. If you are not sure on how to capture video using your Video Editing Software, please check the reference guide for your software. Resolution Many end users are concerned about what resolution they must use in order to capture video. The maximum resolution for the Philips SAA7108/E is 800x600 at 60Hz (NTSC) or 50Hz (PAL). Setting the resolution depends on the capability of the video editing software, how high of a quality desired and hard drive storage limitations; the higher the encoding quality and length of the captured clip, the larger the file. Here are some pros and cons between a high and low resolution example. Higher Resolution: 640x480
Lower Resoltion: 350x240
Conclusion Since there is no perfect setting when capturing video, we strongly encourage customers to try different settings on the video editing software until they find a configuration that best suits their needs. For more information on the video capturing software that you are using, please contact the manufacturer of the software. Information regarding the PowerDirector Pro 2.0 software can be located on Cyberlink's website: |


